If you want a really a quick and easy way to measure areas using an online tool, i recommend Google Planimeter. If you want a more robust solution and have the need to manage multiple fields, read on...
Measuring areas and tracking land units is a common task for environmentalists, farmers, ranchers, and land planners. This tutorial is meant to get you started in not only measuring areas, but tracking information related to fields, creeks, and any other spatial management units.
This tutorial covers how to download free imagery online, install a free GIS application, build a geographic layer (GIS layer), and measure areas. The examples given in this tutorial assumes that you live in Oregon but other sources of data in other areas can be used.
The length of time for going through this tutorial is about 2 hours and requires a good working knowledge of computers.
Step 1: Downloading Imagery
The State of Oregon has a great resource called the Oregon Imagery Explorer:
http://imagery.oregonexplorer.info/DHTML.htm
Using this tool, you can navigate to a specific address and download geo-rectified imagery. A geo-rectified image knows where it is on the earth’s surface and is important for being able to accurately measure areas. Downloading imagery from this application is easy, but you when saving your image, you must do the following:
Click on “Extract Defined Area”.
• Projection = NAD83/UTM Zone10N (western Oregon) OR substitute NAD83/Zone 11N (eastern Oregon)
• Output Format = JPEG
• Enter your name and email address and leave all other settings as they area.
• Click “Submit”
I recommend creating a directory on your hard drive to store all of the data relating to this image and subsequent layers from the following step (there should be two files that are kept together). When you download your image it should be compressed as a zip file and so you can usually just click on this and your computer will extract the files.
Step 2: Downloading and Installing QGIS
QGIS is a powerful Geographic Information System (GIS) software, equivalent to other packages that cost thousands of dollars. The drawback is that installation is a bit more difficult and documentation is not as good. You will need to follow the installation instructions at the QGIS site very carefully.
Download QGIS from http://www.qgis.org/wiki/Download . You will need to choose your operating system and follow instructions for downloading a couple of other pieces of software that must first be installed before installing QGIS.
Step 3: Setting up your QGIS Project
Create a new project and save this project in the directory you made in Step #1. I recommend saving often as occasionally this software may crash and will need to be restarted.
Add your Imagery by clicking “Layer”, then “Add Raster Layer” and pointing to the directory where you extracted your imagery. Choose the file with the *.jpg extension.
Setting the Projections:
This step is very important. Essentially, you are letting QGIS where the image that you downloaded sits on the Earth’s surface. All of your future measurements and area calculations rely on this step in order to work properly.
Click on “Settings”, then “Project Properties”, then click “Coordinate Reference System (CRS)”. In the Coordinate Reference System List, choose “NAD83 / UTM Zone 10.”, the click OK
Highlight the Layer in the view window. Then click “Layer”, then “Set CRS of layer(s)”, and choose “NAD83/UTM Zone 10” again.
Now, you are also setup to begin working with your project. I recommend saving your project at this point and pour yourself another cup of coffee.
Creating a Layer:
Supposing you are a farm owner with a number of different fields that you manage. This next step will show you how to create a digital representation of those fields in your GIS software.
Click “Layer”, “New”, then “New Shapefile Layer”.
In the dialog box, choose Type = “Polygon”
• New Attribute = “areaMeters”, decimal, width=20, precision = 4
• Click on “Add to Attributes List” (it should appear below)
• New Attribute = “areaAcres”, decimal, width = 20, precision = 4
• Click on “Add to Attributes List” (it should appear below)
Click “OK” and then save your new layer to the directory that you made.
Editing the Layer:
In the view window right click or control click on the layer name, and select “Toggle Editing”. This will allow you to edit this layer.
Click the little circle with nodes on it on the menu bar. If you hover your mouse over it, it will say “Capture Polygon”. You can draw polygons around your features with this, draw as many features as you like. Using the imagery as a backdrop you can easily trace your fields with this tool and create a separate polygon for each field.
Updating Area:
In this step, you will figure out the square meters and acreage of your polygons.
1. Right click the layer you just added, and select “open attribute table”
2. Update areaMeters
• Click on field calculator (little calculator image at bottom)
• Select “Update existing field” in the dropdown select “areaMeters”
• Under operators, click “area” (Under “Field Calculator expression”, there should appear a $area) then click OK
3. Update areaAcres
• Click on field calculator again
• Select “Update existing field”, select areaAcres
• In “Field Calculator Expression”, type “area*0.000247105381”, then click OK
• Finally, you may need to click the“areaAcres”to get the calculations to show up.
If you made it this far and everything works then congratulations! If not, don’t despair, there is plenty of documentation available online—look at the QGIS site for their documentation which will be helpful. You may also want to consider hiring a specialist to get you setup and give you a personal tutorial so you can get going.
Monday, November 07, 2011
Tuesday, December 07, 2010
Machine to create single-ply toilet paper

As seen on The Office... an actual machine that creates single-ply toilet paper out of 2-ply toilet paper. Click the picture for more detail .... this really does look like a piece of Amish ingenuity.
This is all part of Dwight's diabolical plans to reduce costs in his building.
Friday, September 29, 2006
Deck Family Farm Website is Up
I've been posting farming related topics over the last year in conjunction with my more nerdly posts on GIS. We now have a website for our farming venture at Deck Family Farm. Check it out if you are interested in natural meats. We are starting to take orders for direct-shipped frozen meat boxes!
Tuesday, August 29, 2006
Fence for home on a farm update
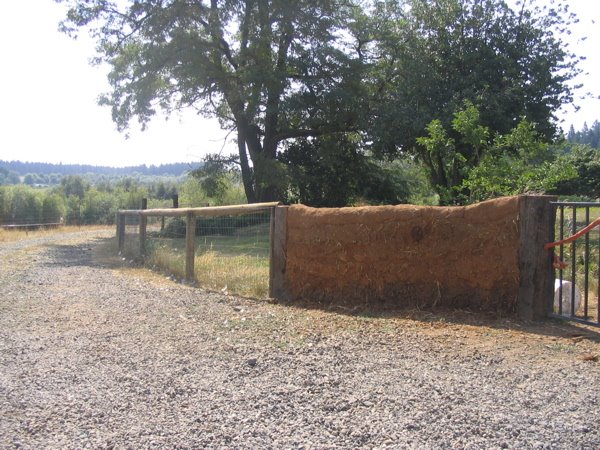 Here is a photo of the fence that I wrote about last November. Most of it is done with the exception of gates. I am very pleased with the design as the fence went up pretty quick, even counting the phone and septic lines we managed to precisly locate with our auger.
 In the photo is a small section of cob wall we have near our front gate. The cob is built using Oregon Cob, a new method based on a very old technique using clay, sand, and straw to build the wall. The straw acts like rebar, holding the whole mass together, while the clay holds the sand together, and the sand adds the mass. We have yet to put the outer coat on, which will be a clay-dung (yes, its dung-- we are going to use llama poop) mix and on top of that a linseed oil/ beeswax mix.
Friday, June 02, 2006
Alternatives to Synthetic Nitrogen Fertilizer
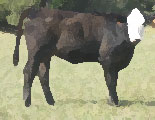
We are raising organic beef. Though we are not certified at this time, we are following the rules. One particular aspect of being organic is not using synthetic nitrogen fertilizers. This is a big deal when most livestock producers around you are using synthetic nitrogen. The benefits touted are more grass for hay and forage and the grass responding to the nitrogen will respond better than the weeds. In the words of one rancher on our decision to not use synthetic nitrogen fertilizer- "You won't get nothin' from that land without it".
After some reading its clear that there are a number of ills associated with using synthetic nitrogen, including: reliance on fossil fuels to produce it, changing soil chemistry, investing in methods requiring intervention as opposed to using time & energy in other methods that may be more productive.
A few sites detailing the ills of synthetic nitrogen:
http://hollandimac.chem.rochester.edu/n2cycle.pdf
http://www.nofa.org/tnf/nitrogen.php
http://www.farmandranchguide.com/articles/2006/05/25/bullseye/production_news/prod10.txt
Finally, i mentioned "other methods" above that could be used instead of synthetic nitrogen. This is where I want to begin to focus my attention. Some ideas are:
1) Management intensive grazing. For reading see: http://www.amazon.com/gp/product/0961780738/102-1149708-9712913?v=glance&n=283155
2) Overseeding legumes. Legumes fix nitrogen so used in permanent pastures can have a positive impact. Timing on this is critical.
3) Planting combinations of early & late season grasses to extend the grazing season. (I have some references on this that i'll post when i find them)
4) Fencing off creeks and providing water in the pasture. This helps keep nutrients on the pastures where they belong instead of the creeks where they cause no end of problems. We are pursuing options with WRP and CREP currently to help fence our nearly 2 miles of creek frontage.
More on this topic later!
Thursday, May 18, 2006
MapWiki
My friend Collin Bode and I were sitting around one afternoon bouncing ideas around & through a lemonade and a beer. The big idea came up to create MapWiki. The name says it all. I realized later others have done this. (e.g. http://www.citeulike.org/user/ianturton/article/559523).
We specifically wanted something that could integrate well with natural history collections databases and also include spatial certainty, linking back to source specimen records, and a registry of organizations and names.
Anyway, a rough prototype lives at: http://mapwiki.berkeley.edu/
We specifically wanted something that could integrate well with natural history collections databases and also include spatial certainty, linking back to source specimen records, and a registry of organizations and names.
Anyway, a rough prototype lives at: http://mapwiki.berkeley.edu/
Thursday, February 23, 2006
Layerwing WMS services with GoogleMaps >= v2.36
With the change in code in the Google Maps API v2.36, some things broke in my previous post about how to do WMS layering in V2 of Google Maps. I've posted a working sample of the WMS code for v2.36 and up here.
NOTE #1 (June 9th, 2006): I deleted the code references in the blog and instead point people to the sample link above, where a working version of the code is maintained (the key component is the file called wms236.js).
NOTE #2 (June 9th, 2006): Thanks to Guilhem Vellut for fixing up some Javascript code to make the Mercator Projection work more accurately. Now, it can be used at all zoom levels.
Attributions:
->Mike Williams http://www.econym.demon.co.uk/googlemaps2/ V2 Reference & custommap code
->Brian Flood http://www.spatialdatalogic.com/cs/blogs/brian_flood/archive/2005/07/11/39.aspx V1 WMS code
->Kyle Mulka http://blog.kylemulka.com/?p=287 V1 WMS code modifications
->http://search.cpan.org/src/RRWO/GPS-Lowrance-0.31/lib/Geo/Coordinates/MercatorMeters.pm
->Modified by Chris Holmes, TOPP to work by default with GeoServer.
->Guilhem Vellut for more accurate Javascript Mercator Fxn
NOTE #1 (June 9th, 2006): I deleted the code references in the blog and instead point people to the sample link above, where a working version of the code is maintained (the key component is the file called wms236.js).
NOTE #2 (June 9th, 2006): Thanks to Guilhem Vellut for fixing up some Javascript code to make the Mercator Projection work more accurately. Now, it can be used at all zoom levels.
Attributions:
->Mike Williams http://www.econym.demon.co.uk/googlemaps2/ V2 Reference & custommap code
->Brian Flood http://www.spatialdatalogic.com/cs/blogs/brian_flood/archive/2005/07/11/39.aspx V1 WMS code
->Kyle Mulka http://blog.kylemulka.com/?p=287 V1 WMS code modifications
->http://search.cpan.org/src/RRWO/GPS-Lowrance-0.31/lib/Geo/Coordinates/MercatorMeters.pm
->Modified by Chris Holmes, TOPP to work by default with GeoServer.
->Guilhem Vellut
Subscribe to:
Posts (Atom)